
"How to directly burn camcorder video to DVD from canon camcorder vixia HF200? The videos shot on the canon camcorder are AVCHD format and MTS files. I tried copying to my computer and then directly transfer camcorder video to DVD but does not work. What should I do to convert camcorder to DVD for playable DVD disc to play back on DVD players? Need a special camcorder to DVD converter software?" question from Yahoo Answer.
Many people now have digital camcorders to record videos during big events like birthday party, graduating ceremony, etc. Sometimes they may want to burn and convert camcorder videos to DVD disc for either storage or convenient playback. Many of them may wonder how to do this. It’s easy to transfer camcorder video to DVD disc for making data DVD. However, to convert camcorder to DVD disc playable on DVD players, you need to get a proper camcorder to DVD burner. This tutorial will show you how to convert camcorder video to DVD disc.
Part 1: About Camcorder Video Formats
Unlike digital cameras, which record images in a single file format (the JPEG), digital camcorders record video in a number of different file formats. Understanding these various formats is important because they impact how easy the video is to work with on a computer, how large the files will be and the quality of the video they record. The below formats are the popular camcorder video formats:
These are the most popular camcorder video formats that most camcorders would adopt. How to find out which format your camcorder adopt? You could check the detailed specifications on its official website page and manual.
| DV & HDV | The DV format was designed to store digital video onto magnetic tape. HDV refers to the high definition version of the DV format. DV and HDV files are very memory intensive but produce very quality video. Given the drop in tape-based camcorder sales, fewer consumers need to worry about DV and HDV, but it does remain popular among enthusiasts. |
| MPEG-2 |
Many standard definition camcorders record in MPEG-2. It's also used in high definition camcorders, although not as often. It's a very high quality digital format, the same used in the DVD movies produced by Hollywood studios. That gives MPEG-2 based camcorders a nice advantage over other formats: the video is easily burned to a DVD and most computer media players (like Apple QuickTime and Windows Media Player) support MPEG-2 playback. MPEG-2 is more commonly found in traditional camcorders that are pricier and higher quality than pocket camcorder models. This is, in part, because MPEG-2 video files are larger in size than other formats and thus not as easy to upload to the Web or send in an email |
| MPEG-4/H.264 | Found on most pocket camcorders like the Flip and in many higher-end HD camcorders, MPEG-4/H.264 is actually a very broad family of different formats supporting both standard and high definition video recording. There are several virtues to H.264: it can record very high quality video yet compress it in such a way so as not to consume too much memory. Camcorder makers use the H.264 if they want to offer a "Web-friendly" video product. |
| AVCHD | A variant of the H.264 format, this is a high definition video file format found on most Canon, Sony, and Panasonic HD camcorders (other manufacturers support it as well). AVCHD camcorders can capture very high quality video and they can also burn HD video to a standard DVD disc, which can be played back on a Blu-ray disc player. |
These are the most popular camcorder video formats that most camcorders would adopt. How to find out which format your camcorder adopt? You could check the detailed specifications on its official website page and manual.
Part 2: How to Transfer Camcorder Video to DVD
It’s quite easy for you to transfer camcorder video to DVD to create a data DVD for saving your camcorder videos on DVD disc. The created data DVD disc could be recognized and opened on computer. The below steps would show you how to transfer video from camcorder to DVD in detail.

Step 1. Insert DVD disc
Insert a blank writable DVD-R/DVD+R disc or DVD-RW/DVD+RW disc into DVD recorder drive.
Step 2. Open DVD drive
On your computer, open the DVD recorder drive hard disk.
Step 3. Copy & Paste
Connect your camcorder with computer via USB cable. Open your camcorder on computer. Navigate to the camcorder video folder, copy your camcorder videos from your camcorder and paste to DVD drive disk.
Step 4. Eject DVD disc
After pasting, eject DVD disc. It’s been finished to transfer video from camcorder to DVD.
Note: It should be noted that in this way, you only transfer camcorder video to DVD disc for storing camcorder videos on DVD disc as a data DVD disc. You could open this data DVD disc on your computer and then view the internal camcorder videos, however, you couldn’t directly play it on DVD players. To transfer camcorder video to DVD playable on DVD players, you need to convert camcorder video to DVD format, as showed below.
Part 3: Best Camcorder Video to DVD Converter - Leawo DVD Creator
You cannot copy and transfer camcorder video to DVD disc and expect it to play in anything but your computer. You need to convert camcorder videos to DVD compliant format and then transfer camcorder videos to DVD playable on any DVD player and computer, with the help of Leawo Camcorder to DVD Converter, a professional video to DVD burner software program that could help you convert and burn DVD from camcorder videos, turn photos into DVD slideshow, and even burn ISO files to DVD disc, no matter the videos you shot are saved in AVCHD or MPEG-2 formats.
To burn camcorder video to DVD disc playable on any DVD player, you need to prepare:
- A camcorder with videos you have taken and USB cable for transferring these videos to computer for burning to DVD.
- A computer with a Recordable DVD-ROM/DVD writer, and a blank DVD disc (if you want to transfer videos to DVD disc).
- Free download and install Leawo DVD Creator on your computer as the camcorder to DVD burning software. (Mac users need to download Mac Video to DVD Converter)
The below guide shows you how to burn and convert camcorder to DVD in detail.
At the very first, you need to connect your camcorder with computer via USB cable and then transfer camcorder video to computer for burning. After camcorder videos being available on your computer, follow the below steps to learn how to convert camcorder video to DVD disc playable on any DVD player.
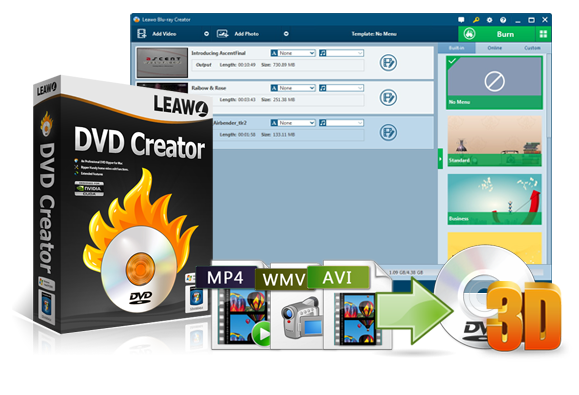
DVD Creator
☉ Convert videos like MP4, AVI, MKV to DVD format fast.
☉ Create DVD-5, DVD-9 disc, folder or ISO image without quality loss.
☉ 1-click operation to create photo slideshows and burn to DVD.
☉ Easily editable effects, 2D to 3D conversion support.
☉ Built-in menu templates and edit disc menu with personal preferences.
![]()
![]()
Note: Leawo DVD Creator has been built into Leawo Prof. Media as a module.
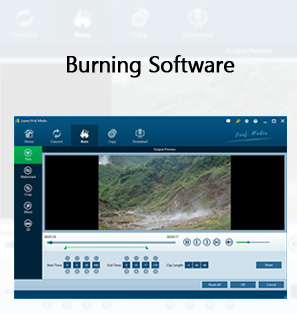
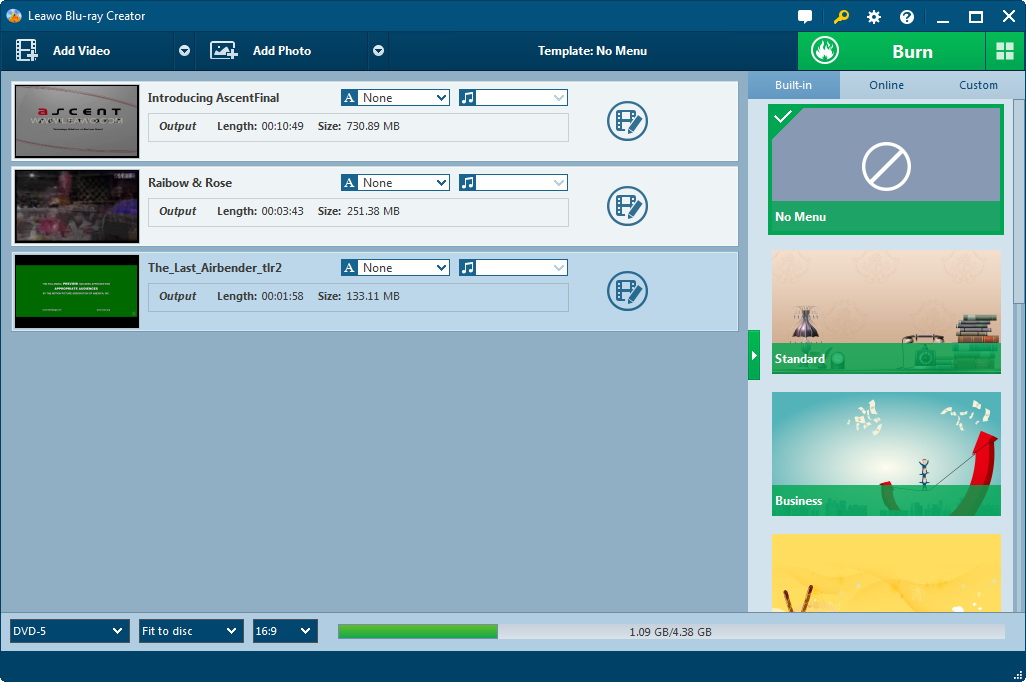
Step 1. Add camcorder videos
Kick off Leawo Prof. Media and then open the “Burn” module. Load source camcorder videos to this camcorder to DVD burner by clicking "Add Video" button on the program interface or direct drag-and-drop.
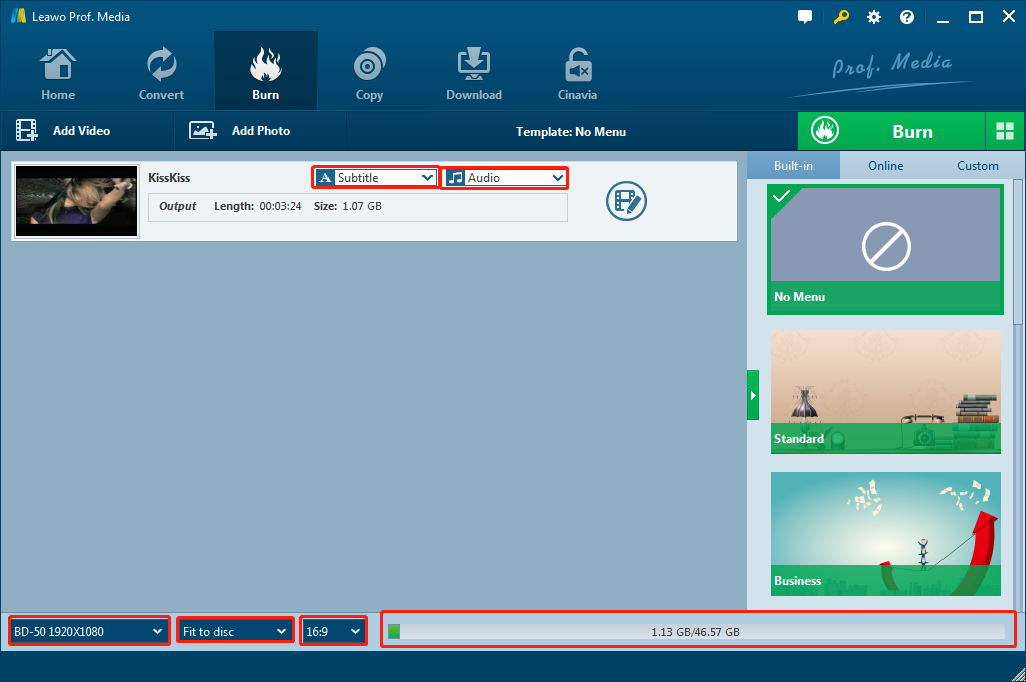
Note:
- To burn camcorder video to DVD disc, you need to insert a blank writable DVD disc into the DVD recorder drive.
- After importing source camcorder videos, set the output disc type (DVD-9/DVD-5 according to the disc you’ve inserted into the DVD recorder drive), bit rate and aspect ratio at the bottom.
- After importing, you could also play back loaded camcorder videos, adjust order of loaded camcorder videos, etc.
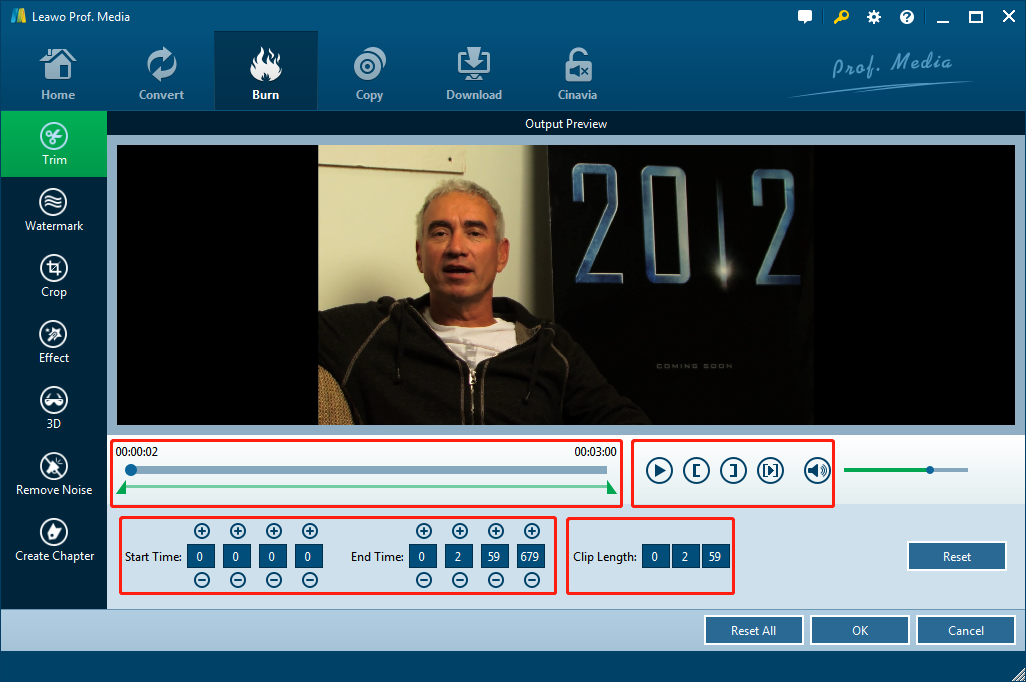
Step 2. Edit Videos (Optional)
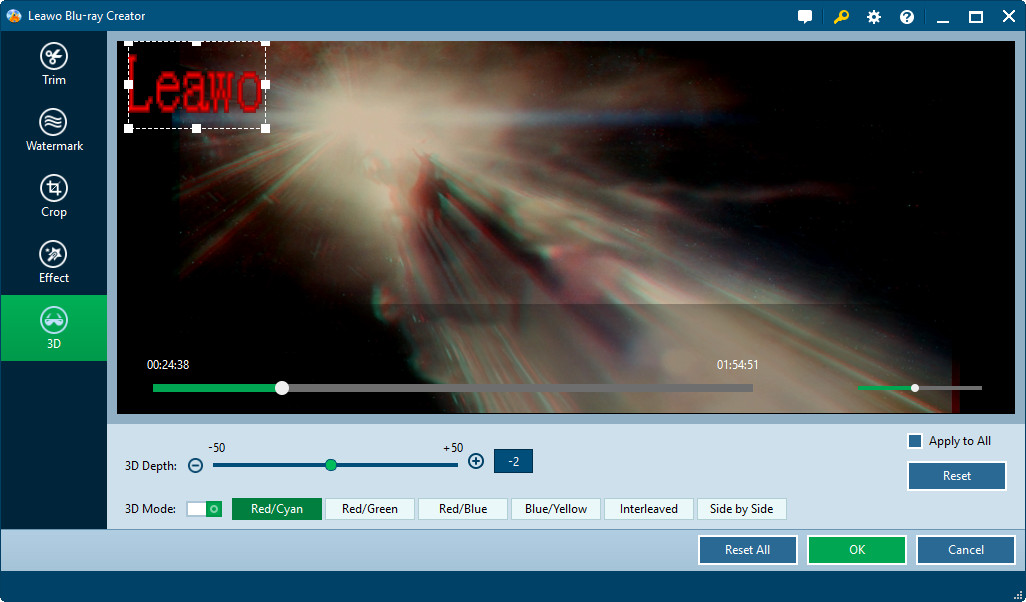
This DVD burner offers optional video editing features, in which you are allowed to "Trim" video length, "Crop" video size, adjust video "Effect" video, apply image or text "Watermark", etc. You could right click an added camcorder video and then select "Edit" option to enter the editing panel.
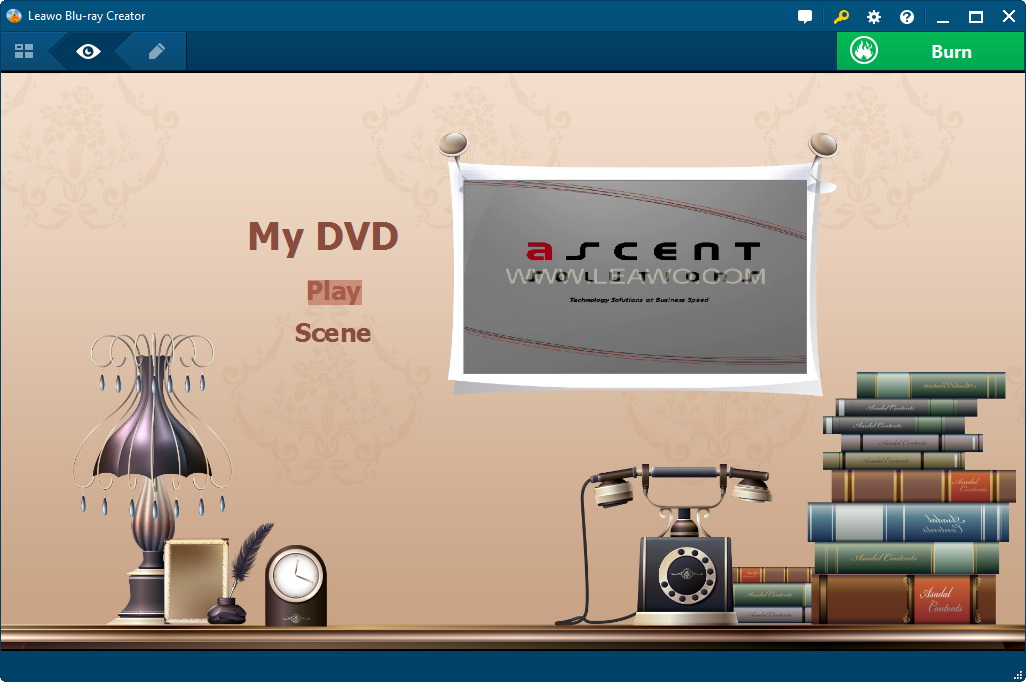
Step 3. Set disc menu
You could select disc menu from the preset free disc menu options on the right of the main program interface. Also, you could click middle eye-shaped icon of selected disc menu to preview selected disc menu template. If you don’t want to add menu for output DVD files, you could just click "No Menu" button on the top of the right sidebar.
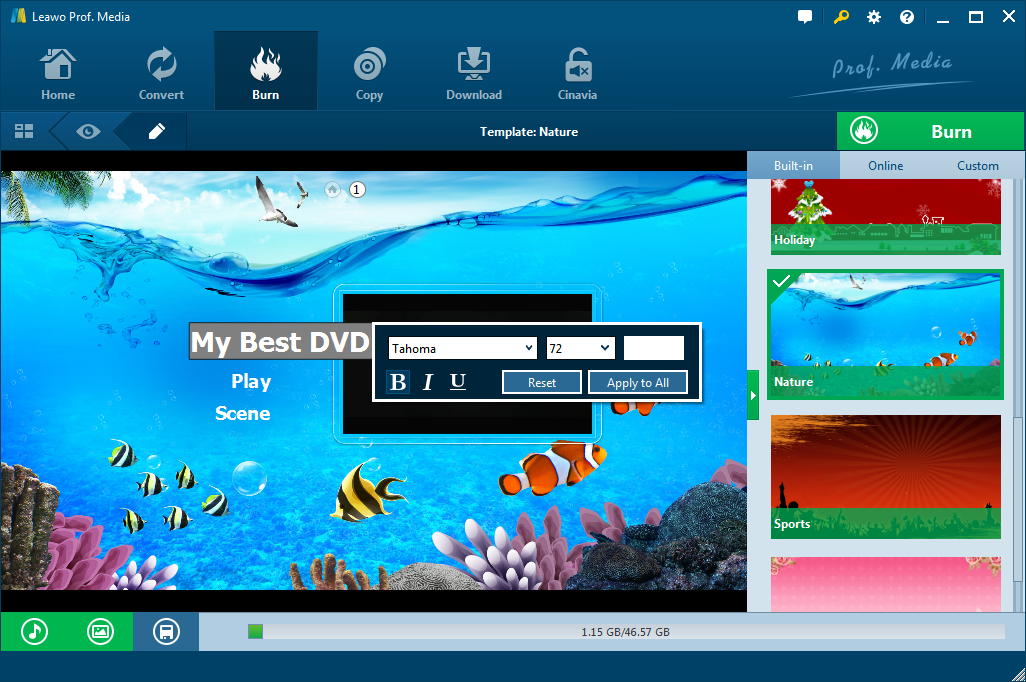
Note:
- This step is optional. You could skip this if you don’t want to add disc menu.
- On the disc menu preview panel, you could click the pencil-shaped icon to edit disc menu with personal preferrences. You can add background music/image/video, change title position and content, adjust text color, font, size, etc.
- You could download more disc menu templates from Leawo’s online database.
Step 4. Further Camcorder video to DVD burning settings
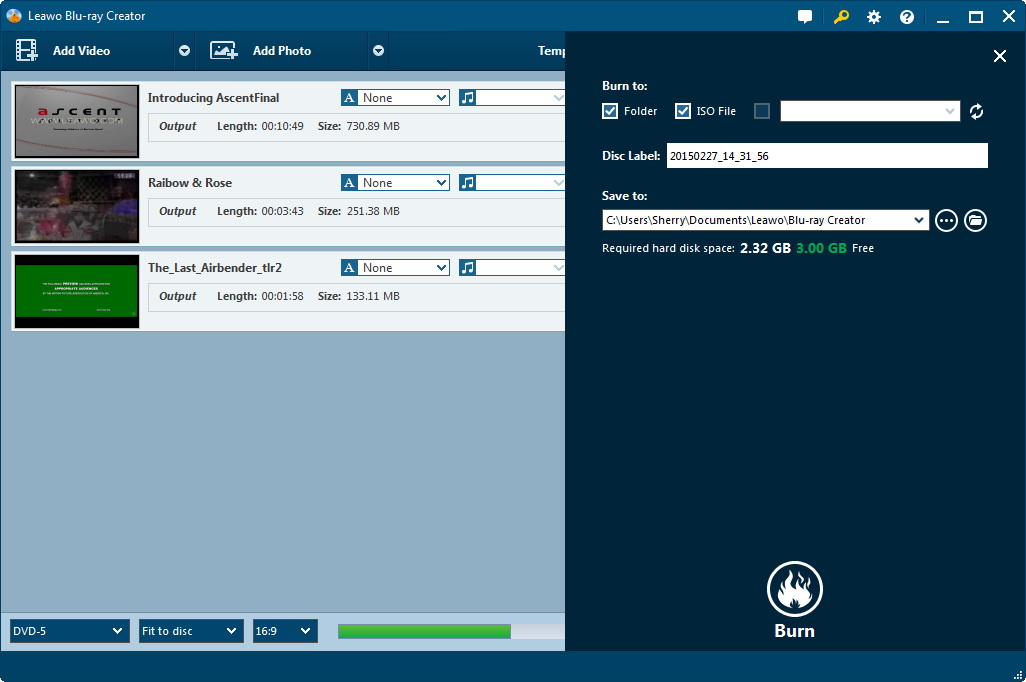
Then, click big green "Burn" button on the main interface to enter the "Burning Setting" panel for more DVD burning settings: Burn to, Disc Label and Save to.
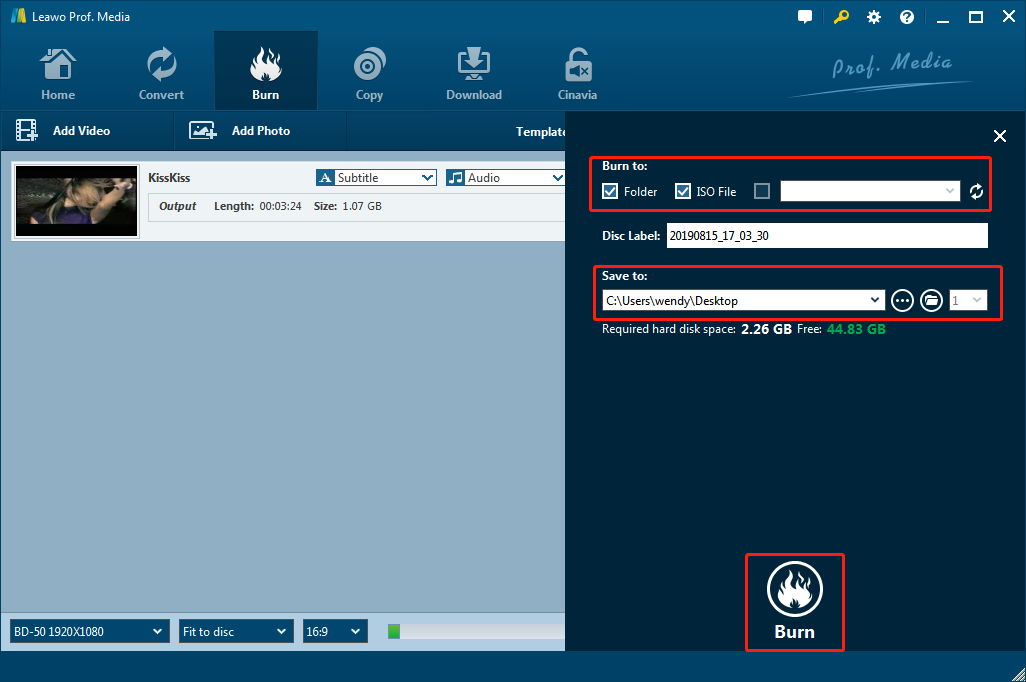
Note:
- Select DVD disc recorder drive as output under the "Burn to" option if you want to burn camcorder video to DVD disc.
- The "Burn to" option allows multiple choices. You could convert camcorder video to DVD disc, folder and/or ISO image file as you like.
- You could also click the wheel icon on the top-right corner and then choose "Copy&Burn" option to set Burning Engine and TV standard.
Step 5. Burn camcorder video to DVD
Hit the "Burn" button on the burning sidebar to start converting and burning camcorder video to DVD movies. After that, you could see all loaded videos being converted and burned to DVD movies. You only need to wait for a while.
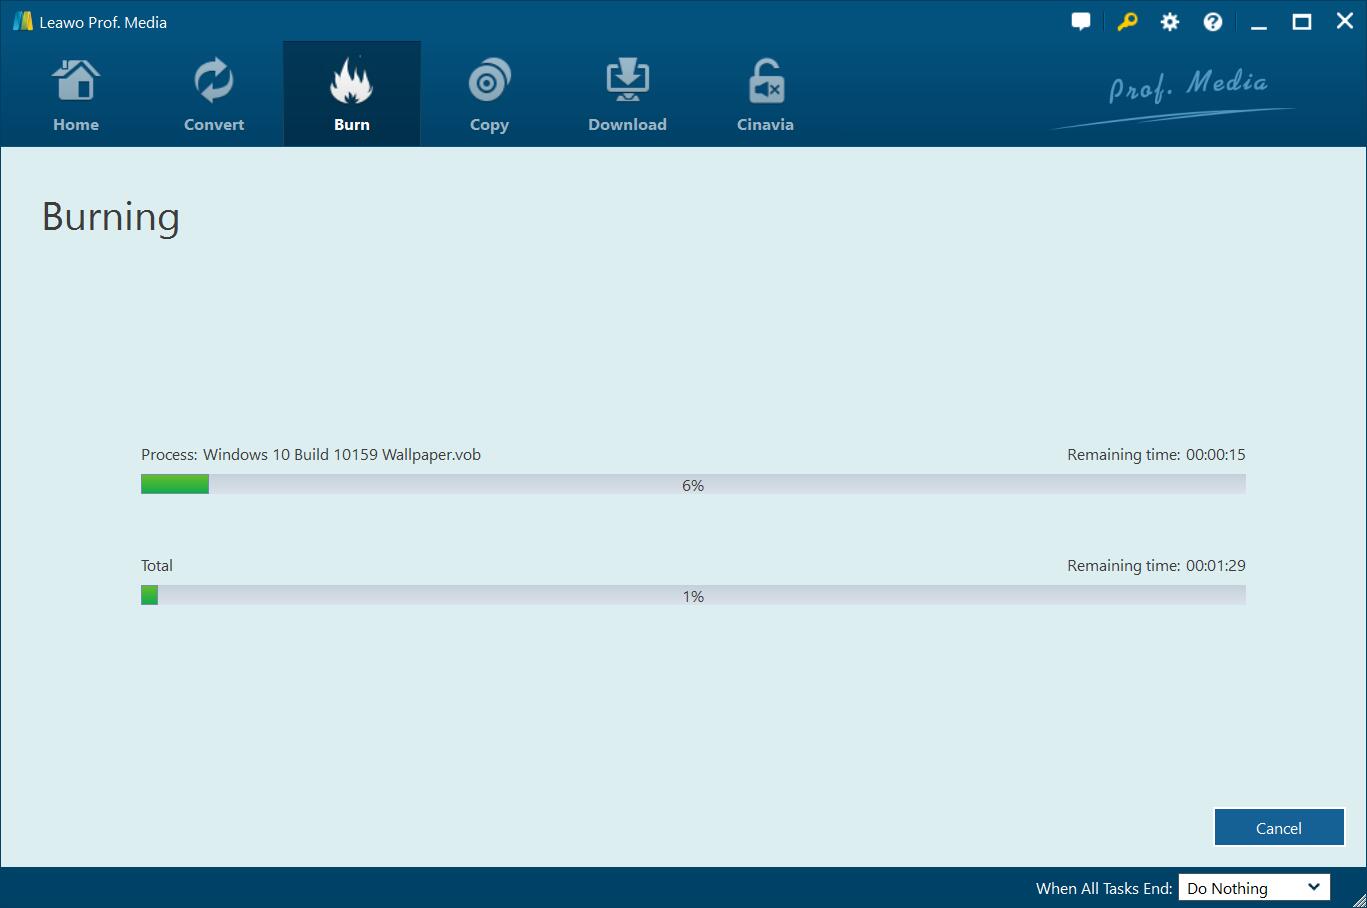
After the burning is finished, you could eject the DVD disc and then insert the created DVD disc into any DVD player for direct playback.
Part 4: Convert Camcorder Video to DVD with DVD Flick
DVD Flick is an open source DVD authoring application for Windows developed by Dennis Meuwissen and released under the GNU General Public License. DVD Flick is capable of importing audio tracks, video files and subtitles, composing a DVD-Video movie and burning it to a disc – or creating an ISO image for later burning.

Follow the below steps to learn how to convert and burn camcorder videos to DVD with DVD Flick:
- Download and install DVD Flick on your computer. Transfer your camcorder videos to your computer.
- Fire off DVD Flick and click the “Add title” button to select one or more of the video files that you want to add.
- You can edit each title by double-clicking it or by clicking on it once and pressing the Edit title button. Here you can set the number of chapters the title will have, either by entering a number or a time interval. You can also add subtitle files, different audio tracks and add another video source to the title.
- Click the Project settings button on the top to open the project's settings.
- At the bottom of the screen you can choose where DVD Flick will put the encoded DVD files, as well as log files of the encoding process.
- When you are all done creating your project, be sure to save it first. Then press the Create DVD button and the encoding process will start.
Similar to Leawo DVD Creator, DVD Flick also enables you to add subtitles and audio tracks, and disc menu for better DVD burning experience. But the operation is a little bit complicated.
Part 5: Comparison and Conclusion
Check the below comparison table to learn the differences between Leawo DVD Creator and DVD Flick before you decide which one to take.
|
|
Leawo DVD Creator |
DVD Flick |
|
Burn video to DVD |
Yes |
Yes |
|
Burn photos to DVD |
Yes |
No |
|
Select subtitles and audio tracks |
Yes |
Yes |
|
Add external subtitles |
Yes |
Yes |
|
Edit video files |
Yes. Trim, crop, adjust effect, rotate, merge files, add image/text watermark, apply 3D effect |
Set titles |
|
Edit photos for photo slideshow |
Yes |
No |
|
Play back source videos |
Yes |
No |
|
Set output DVD video mode |
Yes. NTSC or PAL |
Yes. NTSC or PAL |
|
GPU acceleration |
Yes |
NA |
DVD Flick is a little bit complicated in operating while Leawo DVD Creator is much straightforward. Meanwhile, Leawo DVD Creator offers more bonus features such as the video editing and 3D movie creating features to improve DVD burning experience.
 Aug. 11, 2014 by


 Prof. Media
 Blu-ray Ripper
 Blu-ray Copy
 iOS Data Recovery
 [12/29/23] MAX Downloader V15.0.0
 10,000,000 people are using Leawo!
 All Transactions are protected!
 30-Day Money Back Guarantee!
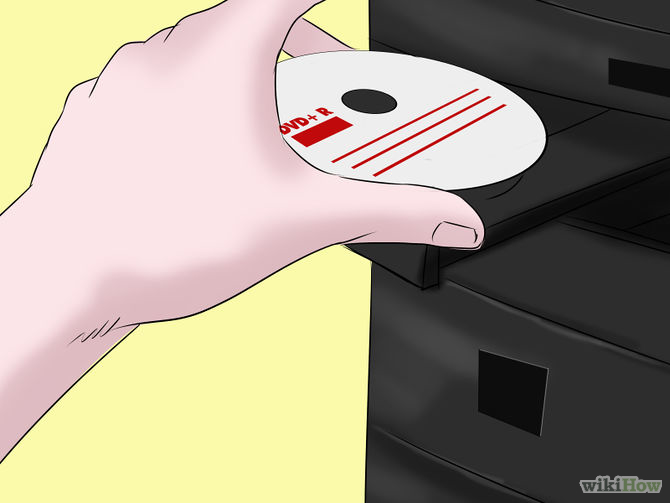