Last week, the iPad HD of my friend only has 100MB left. She came over to ask me whether there was a method to backup iPad to USB for whenever she needed to restore her iPad. Do you also want to transfer iPad to USB when some unexpected incidents happened that might result in the loss of major data? Have you determined to sell your old iPad? So you may desire to backup iPad to USB before the transaction as well. No matter for what reason, you may find that it is a little tough to backup iPad to USB stick. Don’t worry. If you have this problem, you can read this guidance to know how to connect iPad to USB drive.
To backup other kinds of files:
How to Backup iPhone Apps to Computer
How to Backup iPhone 7/SE/6s/6/5s/5/4s/4
How to Backup iPhone SE with/without iTunes
Part 1: Backup Photo and Video iPad to USB Stick via Windows Explorer
If you have a PC, you can take advantage of this method to assist you to transfer iPad to USB. Windows Explorer enables users to backup photos and video iPad to USB stick. If you want to know the detailed steps, please refer to the contents below.
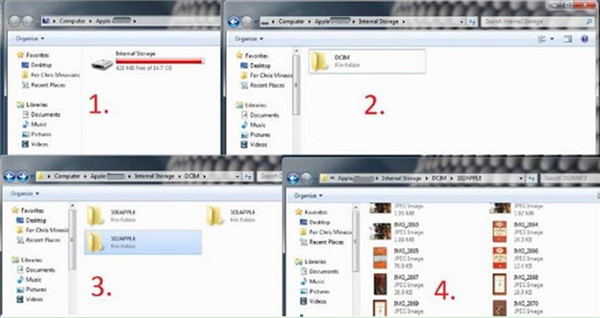
1. Connect your iPad with PC via the USB cable and then tap “Trust” on your iPad.
2. Navigate to the “Windows Explorer” and the iPad icon will show in the interface.
3. Click to open it and tap “Internal Storage > DCIM”. The iPad photos and videos will display in the window.
4. Plug your USB stick to your computer, and then head to the folder of your USB drive. Finally, you can copy and paste the photos and videos you want to back up from the folder of “DCIM” to the USB drive.
Using Windows Explorer, the videos and photos that you can backup iPad to USB will be saved in your USB drive successfully. However, if you want to back up other files, you can continue to read this tutorial for reference.
Part 2: Backup iPad to USB Drive via iTunes
iTunes is a good tool to transfer iPad to USB stick, which is free to use and can even work without the Internet. Here I would like to show you how to connect iPad to USB drive for backup with iTunes in detail.
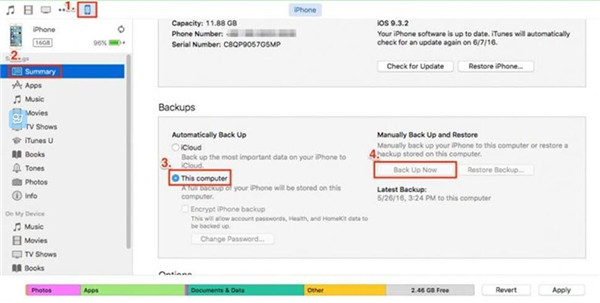
1. Back Up iPad to Computer
Plug iPad to computer and launch iTunes. Click on “iPad > Summary > Backups > This computer > Backup Now”. The iPad files will be backed up to computer.
2. Find the Location of iTunes Media Folder
By default, you can find the iTunes Media folder in the iTunes folder on your computer.
Mac: Finder > username > Music
Windows Vista or later: \ Users \ username\ Music \
Windows XP: \ Documents and Settings \ username \ My Documents \ My Music\
If you fail to find the iTunes Media folder via the paths listed above, you can check out the steps below to locate it.
1) Launch iTunes on your computer.
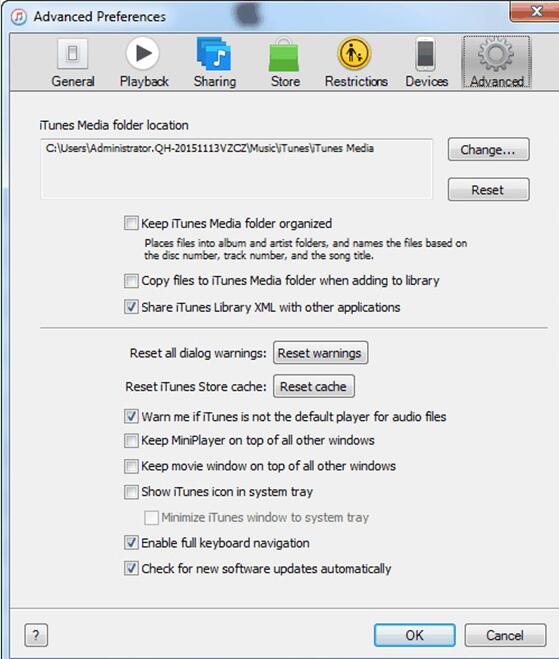
2) Mac: Click on “iTunes > Preferences” in the interface. Windows: Click on “Edit > Preferences” in the window.
3) Tap the “Advanced” panel. Then you can find the path of your iTunes Media folder under the option of “iTunes Media folder location”.
3. Consolidate the Library of iTunes
It is necessary to consolidate the media into the folder of iTunes Media before you start to transfer iPad to USB stick via iTunes.
1) Launch iTunes on your computer.
2) Mac & Windows: Click on “File > Library > Organize Library”.
3) Check “Consolidate files > OK”.
4. Backup iPad to USB Drive
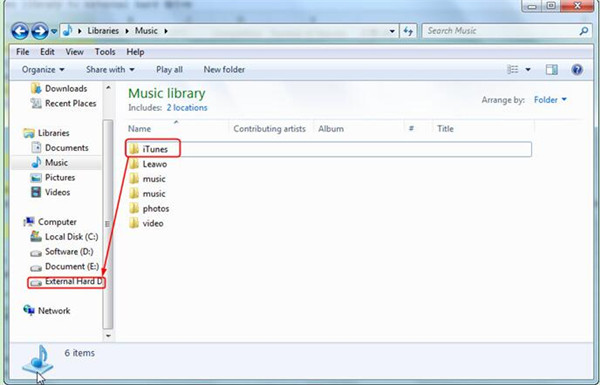
1) Close iTunes and navigate to the iTunes folder in the location that has been introduced in the second step in this part.
2) Drag folder of iTunes from the location you find to the USB drive.
This solution is a little bit complicated to backup iPad to USB. If you want to transfer iPad to USB more directly and accurately, you can use Leawo iTransfer to handle the problem. This solution will be illustrated in the next part. Follow me to have a look.
Part 3: Transfer iPad to USB Drive via Leawo iTransfer
Leawo iTransfer is quite useful for you to connect iPad to USB drive. It can assist you to organize and transfer up to 12 types of documents and data, such as photos, videos, music and so on. You need to download and install this tool on your computer before you can make use of it. In order to tell you how to transfer iPad to USB stick, I would like to take how to back up photos from iPad to USB drive with Leawo iTransfer for instance.
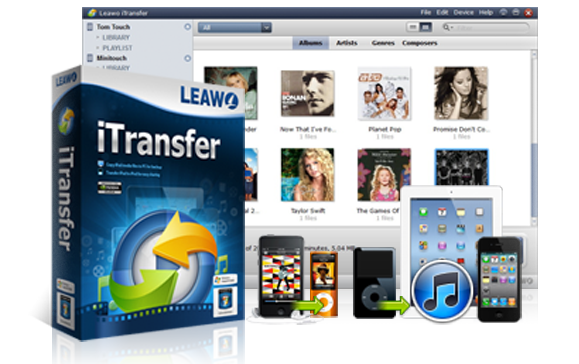
Leawo iTransfer
☉ Transfer files among iOS devices, iTunes and PCs with ease.
☉ Transfer up to 14 kinds of data and files without iTunes.
☉ Support the latest iOS devices like iPhone 7, iPhone 7 Plus, etc.
☉ Play back, view, and delete data and files on iOS devices.
Step 1. Plug iPad and USB into Computer
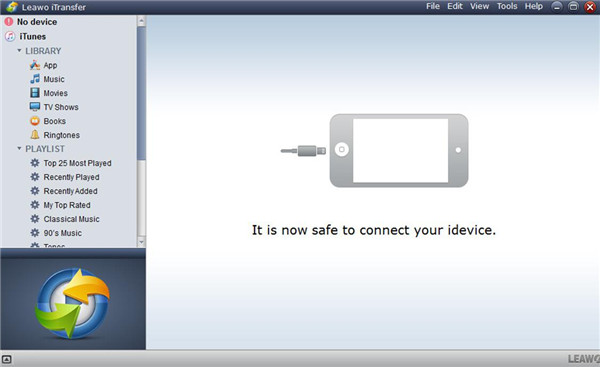
Run Leawo iTransfer on PC. Connect iPad to PC via USB cable. Connect USB stick to computer. The program will detect your iPad and show the libraries of your iPad in the left side bar.
Step 2. Choose Photos to Transfer
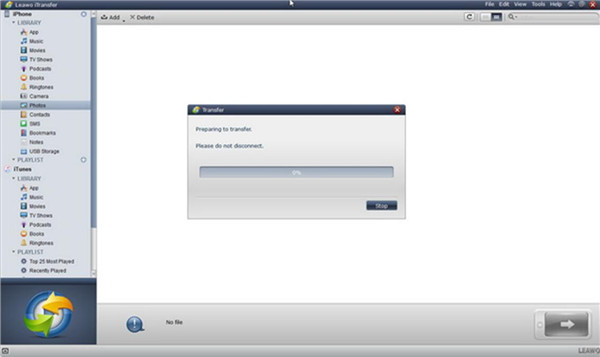
Click on the iPad icon and then tap “LIBRARY > Photos”. Your iPad pictures will show in the right part of the window. Select the photos you need to transfer and click on the arrow-like transfer button at the bottom right of the interface. In the pop-up panel, tick “Save to Folder” and click on “Change” to browse your computer. Choose the USB stick as the output folder and click on “Transfer Now” to start transferring photos from iPad to your USB drive. The process is viewable. You need to wait until the transfer is over. Then you can get the iPad photos on your USB stick.
If you want to back up other iPad files to USB, you can click on the library you need and refer to the example above to realize your goals. This solution is quite easy to handle. You can backup iPad to USB drive quickly and professionally with Leawo iTransfer. Now you can download and install this tool to have a try. You will fall in love with this powerful program the first time you use it.

