
With the development of the Internet and technology, you can always find all the information you need on the Internet. Do you want to know how to airdrop from iPad to Mac? I'd like to share my methods on the web for you to search for and refer to. If you think my methods are helpful, you can have a try. I really hope this guidance can offer you some help in case you need. Let's begin to see the following content.
More popular articles related with iPad data transfer:
How to Sync Apps from iPhone to iPad
How to Delete Videos from iPad to Free up Storage Space
How to Copy Photos to iPad
Part 1: How to Airdrop from iPad to Mac
AirDrop is a program of Apple Incorporate, which can be used to share pictures, movies, locations or other files and data to a nearby iOS device. It is quite convenient to use if your iPad and Mac are able to use AirDrop. As for how to airdrop iPad to Mac, you can follow me to check the detailed steps.
1. Turn on Bluetooth and Wi-Fi on your iPad. Your AirDrop should also be turned on at the same time automatically. If the AirDrop hasn't been enabled, you need to navigate to the AirDrop at the "Control Center" to turn it on. Then you need to tap on AirDrop. Three options will appear and you can choose "Contacts Only" or "Everyone".
2. Navigate to "Finder > AirDrop" on your Mac and then click on "Allow me to be discovered by" at the bottom of the window to determine to select "Everyone" or "Contacts Only". The "Finder" window needs to be kept open, because it enables you to make use of AirDrop.
3. You need to wait until your iPad shows in the AirDrop window. Then you can use AirDrop to connect your iPad with Mac.
4. Click to open your iPad file which you would like to airdrop from iPad to Mac, and "Tap to Share with AirDrop" will display in the window. Finally, you can tap on the Mac logo to share the documents.

5. When your iPad and Mac have logged into the same iCloud account in the process of file sharing, the shared files will be received by your Mac and be saved in an automatical way. Otherwise, a window will pop up to inquire you if you accept the file items or not, you need to click on "Accept" to save the items to your Mac.

This way is quite easy to solve the problem of "Can you airdrop from iPad to Mac". However, if your iPad and Mac can not use Airdrop in some cases, you can continue to look this guidance to see how to airdrop iPad to Mac with AirDrop alternatives.
Part 2: Free AirDrop Alternative – iTunes
iTunes can be used to play, download, and organize digital downloads of music and video on Mac and Microsoft Windows operating systems. It can be used as a free AirDrop alternative. If there is no network, you can choose this software to help you to view, play and sync files and data of your iPad easily. Now let's see how to airdrop from iPad to Mac with this AirDrop alternative.
1. First, you need to download and launch iTunes on your Mac and make sure it is the latest version.
2. Connect your iPad with your Mac with matched USB cable and the computer will recognize your iPad automatically. The iPad icon will appear at top left corner of the window.
3. You need to choose "Manually Back Up and Restore > Back Up Now". You can also choose "Automatically Back Up > This computer" to realize the direct iPad to Mac airdrop. Finally, you can tap on "Done" to complete the process. Wait until the backup procedure is over. The iPad files and data will be backed up to this free Airdrop alternative – iTunes.

4. Take Advantage of "File Sharing" to Airdrop iPad to Mac
1) Navigate to "iPad icon > Apps > File Sharing" to choose one app to check what data and files can be shared by this software on your iPad. If there is no "File Sharing" part on the iTunes interface, it proves that your iPad has no file-sharing app.
2) In the window of "File Sharing", choose one from the listed apps. Navigate to the list of "Documents" to drag down to copy documents to a window or a folder on your Mac. You can also choose the documents you want to airdrop from iPad to Mac from the list of "Documents" and tap on "Save to". Then head to the folder on your computer to which you would like to airdrop the documents and tap on "Save To".
iPad to Mac airdrop is not difficult at all. You can use this free alternative of Airdrop — iTunes to realize your goal. If you don't want to use the file sharing function or back up all data to your Mac, you can take advantage of the best AirDrop alternative - Leawo iTransfer. Follow me to see how to use this powerful software to solve the problem of how to airdrop from iPad to MacBook.
Part 3: Best AirDrop Alternative - Leawo iTransfer
If you want to solve the problem of "how do I airdrop from iPad to Mac", you can use Leawo iTransfer for Mac to assist you. This is a third-party program that has many amazing functions. You can take advantage of this software to transfer and manage files among iOS devices, iTunes and Mac computers without iTunes, and users are able to transfer many files easily. The following steps will tell you how to airdrop from iPad to MacBook with Leawo iTransfer. Here, I will take pictures for example.
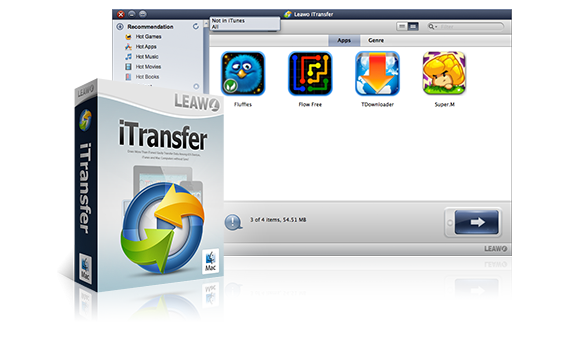
Leawo iTransfer for Mac
☉ copy files among iOS devices, iTunes and PCs with ease.
☉ copy up to 14 kinds of data and files without iTunes.
☉ Support the latest iOS devices like iPhone 7, iPhone 7 Plus, etc.
☉ Play back, view, and delete data and files on iOS devices.
![]()
![]()
Step 1: Launch Leawo iTransfer and Connect iPad with Mac
Launch Leawo iTransfer for Mac and plug iPad to Mac with matched USB cable. The program will recognize your iPad, and the iPad libraries will appear in the left window.

Step 2: Select Documents to Airdrop from iPad to Mac
Head to "iPad > LIBRARY > Photos", then you need to hold "Command/Shift" key to choose the pictures that you would like to airdrop from iPad to MacBook. Tap on the "Transfer" button at the bottom right of the window. You can also right-click one picture which you have chosen and tap on "Transfer to". Then you need to choose "My Computer".

Step 3: Select Output Folder for the Airdrop from iPad to Mac
After you choose the pictures you want to airdrop to MacBook from iPad, a pop-up window will allow you to set the output folder for the airdropped files. You need to tick "Save to folder" and tap on "Change" to select a folder on your computer to save the pictures.

Step 4: Airdrop from iPad to Mac
Tap on "Transfer Now" to start airdropping photos from iPad to MacBook. You can see the procedure clearly in a percentage window. Wait for the completion of the process.

Leawo iTransfer is quite useful when it comes to airdropping files, for it can help you to organize and transfer up to 14 kinds of documents and data from Mac, such as movies, songs, notes and so on. This professional and powerful software is your best choice to airdrop from iPad to Mac. You can have a try to verify whether Leawo iTransfer is the best AirDrop alternative.
Each coin has two sides. Every method has its own advantages and disadvantages. AirDrop is easy to use, but the distances between the devices are limited and it also requires the network. iTunes is free to use and can airdrop from iPad to Mac without any difficulty, but it has a big shortcoming that it will back up all files and data on your iPad to your Mac. And the file sharing function of iTunes is not so convenient and it has many limitations. Leawo iTransfer is regarded as the best Airdrop alternative, for it is quite convenient to use and will transfer files from iPad to MacBook accurately and quickly. The process is also viewable. If you want to airdrop from iPad to Mac now, I recommend you try Leawo iTransfer. You will fall in love with this great tool right away.
 Sep. 07, 2021 by


 Prof. Media
 Blu-ray Ripper
 Blu-ray Copy
 iOS Data Recovery
 [12/29/23] MAX Downloader V15.0.0
 10,000,000 people are using Leawo!
 All Transactions are protected!
 30-Day Money Back Guarantee!