Photo Stream helps Apple users easily back up their photos on iPhone and enables another device to access the current device's pictures. Someone said it sounds like iCloud Photo Library and they are quite confused at the differences between Photo Stream and iCloud Photo Library. Some of them even have no idea how to access Photo Stream on iPhone. If you want to know the differences between iCloud Photo Library and Photo Stream or you want to learn how to set up and start using Photo Stream on your iPhone, you can take your time to read this guide.
You may also be interested in:
How to Recover Photos from Broken iPhone
How to Copy Photos to iPad
How to Delete iPhone Photos Synced from Computer
Part 1: Differences between Photo Stream and iCloud Photo Library
What's the difference between Photo Stream and iCloud Photo Library? In fact, iCloud Photo Library enjoys more powerful backup functions and larger capacity. It can store all photos and videos on your iPhone, while Photo Stream can only store recent photos. If you would like to have a clearer overview of the differences between Photo Stream and iCloud Photo Library, you can take a look.
1. Photo Stream is only allowed to store most recent 1000 photos or last 30 days of pictures, while iCloud Photo Library is able to store all photos and videos on your device without limits.
2. Photo Stream doesn't use iCloud storage, while iCloud Photo Library use iCloud storage.
3. You can access Photo Stream on all devices including iPhone, iPad, Mac and PC, while if you would like to access iCloud Photo Library, you have to log in iCloud official website.
4. Photo Stream only stores web-optimized images, which lowers the quality of images. iCloud Photo Library saves full-resolution pictures and allows users to store files in the format of JPG, PNG, GIF, RAW and so on.
5. When your Photo Stream is turned on, you can still sync photos from your Mac or PC via iTunes, while you can't sync photos from your Mac or PC via iTunes when iCloud Photo Library is activated.
Part 2: How to Use My Photo Stream on iPhone
Now we know the differences between Photo Stream and iCloud Photo Library, some beginners are wondering, "how to use my Photo Stream on iPhone?" In fact, it is quite handy to learn how to access Photo Stream on iPhone as long as you have iPhone at hand. Next, let's read how to set up and start using Photo Stream on your iPhone.
1. To know how to set up and start using Photo Stream on your iPhone, first you need to click the gear icon on your iPhone to open Settings app.
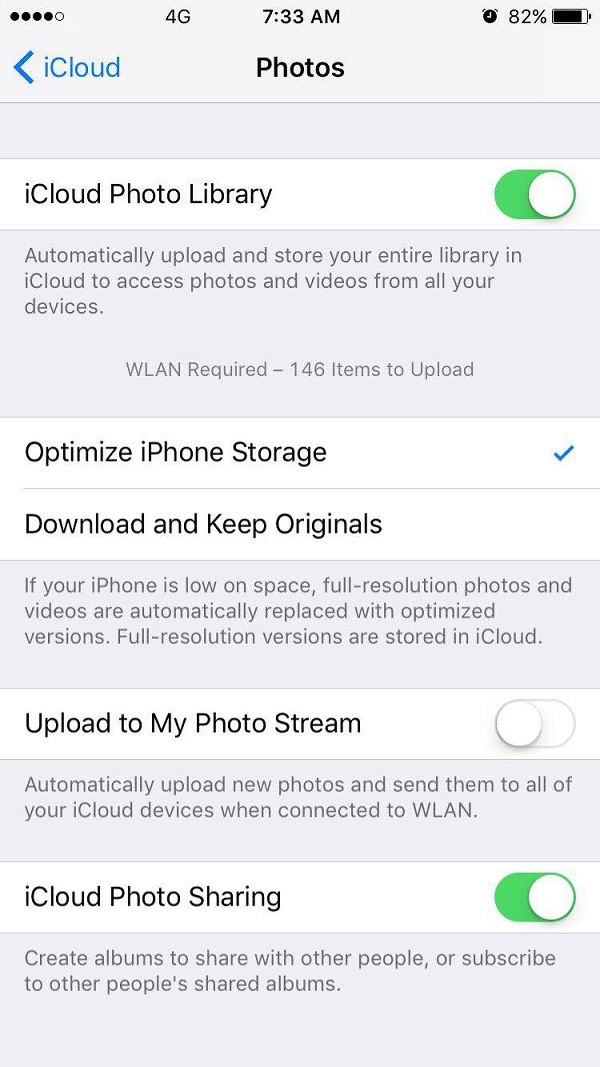
2. Click on "Apple ID > iCloud" and locate "Photos".
3. Tap on "Photos" and scroll down to find "Upload to My Photo Stream".
4. Turn on "Upload to My Photo Stream" and you will see the sider turns green, which means your Photo Stream is activated. All new photos can be sent to all of your iCloud devices.
Another way to solve "how to use my Photo Stream on iPhone" is:
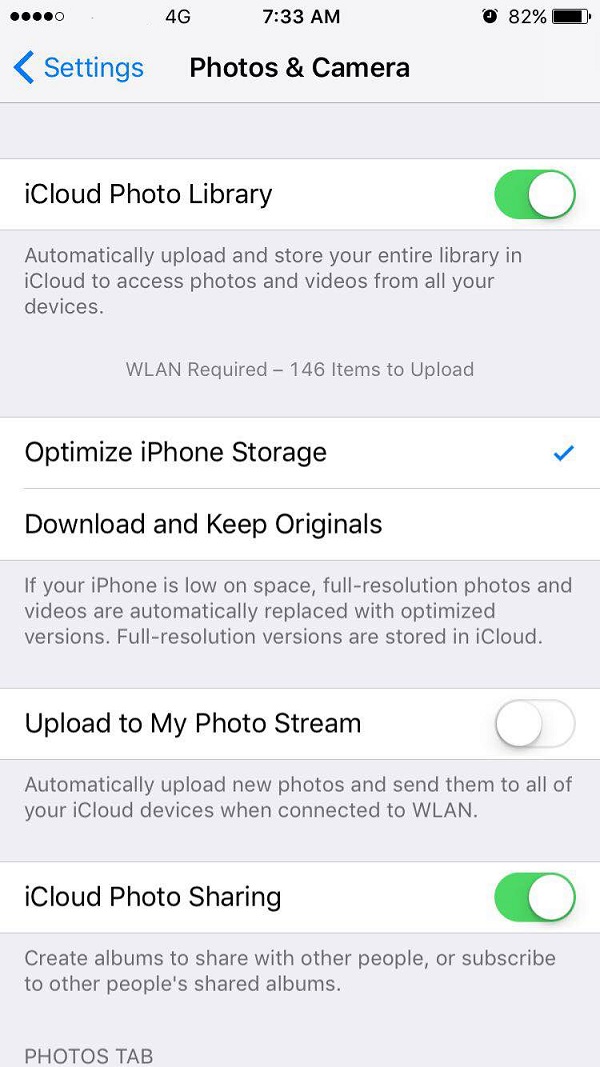
1. Open "Settings" on your iPhone.
2. Scroll down and click "Photos & Camera".
3. Turn on "Upload to My Photo Stream" to enable Photo Stream.
If you would like another device to have photos you have on your current device, you can turn Photo Stream on these two devices.
Part 3: How to Transfer Photos from iPhone to PC via Leawo iTransfer
Leawo iTransfer positions itself a terrific transferring tool which can be used to transfer photos, contacts, TV shows, books and so on between iPhone, PCs and iTunes. With super straightforward and intuitive interface, Leawo iTransfer can easily be handled by new Leawo iTransfer beginners. You can adopt Leawo iTransfer to transfer purchased and non-purchased contents. Now let us take a look at how to transfer photos from iPhone to PC with Leawo iTransfer.
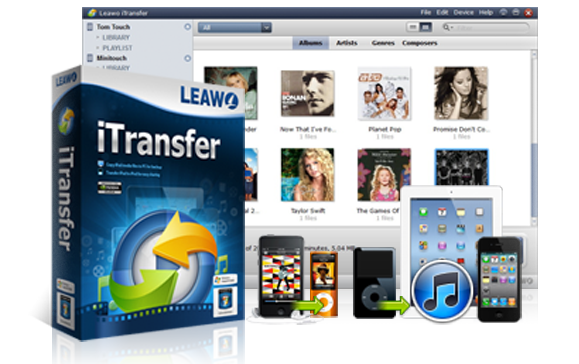
Leawo iTransfer
☉ Transfer files among iOS devices, iTunes and PCs with ease.
☉ Transfer up to 14 kinds of data and files without iTunes.
☉ Support the latest iOS devices like iPhone 7, iPhone 7 Plus, etc.
☉ Play back, view, and delete data and files on iOS devices.
1. Launch iPhone USB pictures transfer
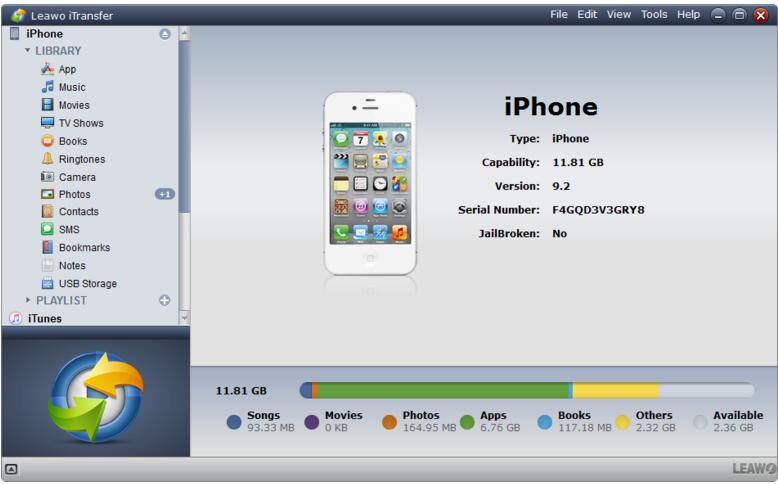
Plug iPhone to computer via USB cable and start Leawo iTransfer. The software will automatically recognize iPhone. In the right area of the software, basic introduction to your iPhone like type, capability, version and serial number is displayed. In the left sidebar, different kinds of contents like app, music, movies, TV shows, books and so forth are shown.
2. Choose photos on your iPhone
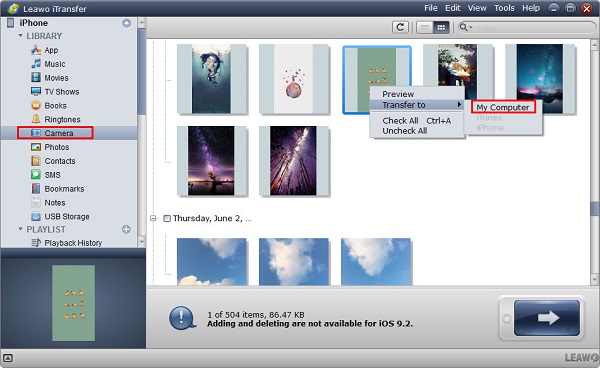
In the left sidebar, navigate to "iPhone > Library > Camera", iPhone photos appears in the right interface. Press "Ctrl" to select photos you need to transfer, then right click the selected photos to choose "Transfer to > My Computer", or click the transferring icon in the lower right corner to transfer photos from iPhone to PC.
3. Set a destination folder
In a pop-up window, choose a destination folder by clicking on "Change". Choose any folder on your computer you prefer as the output directory. Now click "Transfer Now" to transfer photos from iPhone to computer. A progress bar will indicate the process of transferring. After a couple of seconds, you will have photos on your computer.

