Have you met a situation like that when you upgrade your iPhone to the new iOS version, there is something wrong with visual voicemail, even though your iPhone has been rebooted, the voicemail still cannot work normally? “What cause the voicemail cannot work?” “What can I do to fix this problem?” “I have reset the network connection but it helps nothing.” Many iPhone users complained about this issue.
Visual voicemail came up in 2007 along with the initial launch of iPhone, which offers a way of sending, viewing and checking voicemail conveniently on iPhone. Therefore, dialing number and listening to voicemail via automated leaving message system has become obsolete for Apple device. Visual voicemail app can be easily used on your iPhone in the purpose of sending or playing a voicemail. But if you have met a problem as mentioned above that the voicemail cannot work on iPhone especially after the iOS system has been upgraded. I will tell you are lucky to be here to read this article about how to fix the issue of voicemail not working on iPhone.
Part 1: Why is iPhone x/8/7/6 visual voicemail not working?
Generally speaking, what causes visual voicemail not to work on iPhone can be explained in two reasons as follows:
1. It is commonly seen that iPhone visual voicemail not working is caused by bad networking. Some bugs may exist in the network connection between your iPhone and carrier. Therefore, when your iPhone has been upgraded to a new system version, the bugs will result in interrupting the network connection and cause the voicemail cannot be downloaded via wireless carrier.
2. Visual voicemail not working can also be caused by the app problems on your iPhone, like the voicemail setting or the network setting or the signal state or others.
Part 2: How to fix iphone visual voicemail not working?
Some regular problems which are commonly seen on Visual voicemail include: no voicemail messages showing on iPhone, voicemail cannot work currently, voicemail messages cannot listen to and so on. Below are five ways of fixing this problem on voicemail.
1. Reboot iPhone to fix voicemail not working problem.
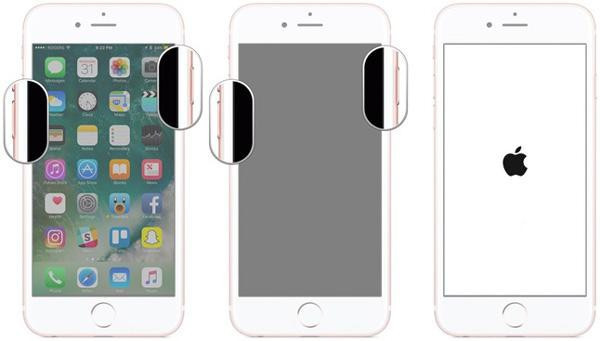
Rebooting iPhone is one of the most effective ways to help you to solve multiple kinds of problems on your device. Try to restart your iPhone firstly if the voicemail is not working correctly.
You can try to restart iPhone 6s by pressing and holding on the home button together with the power button till the Apple logo can be seen.
You can try to restart iPhone 7 by pressing home button along with volume button till the Apple logo comes up.
To restart iPhone 8X, pressing on the volume up button and quick releasing and then pressing on the volume down button and quick releasing, finally pressing and holding the power button till the Apple logo shows up can complete the restart work on iPhone 8X.
2. Fix voicemail not working problem via resetting the network settings.
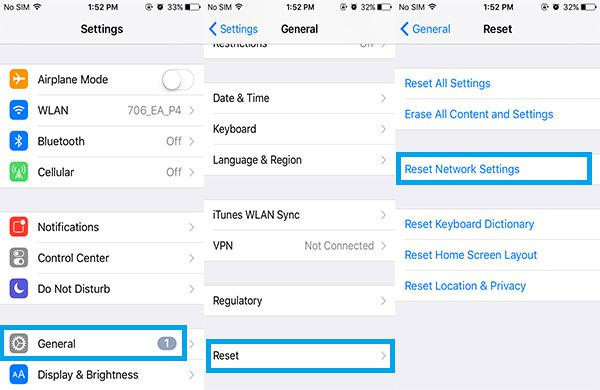
You can fix the voicemail not working problem by resetting network settings, which will make the network of your iPhone restore to factory setting, but the existed data will not be deleted. The specific steps are shown as below:
I. Run setting app on your iPhone.
II. Go to General > Reset > Reset Network Settings, then enter the passcode one more time to complete the network resetting task on your iPhone.
3. Fix iPhone voicemail problem by updating iOS version
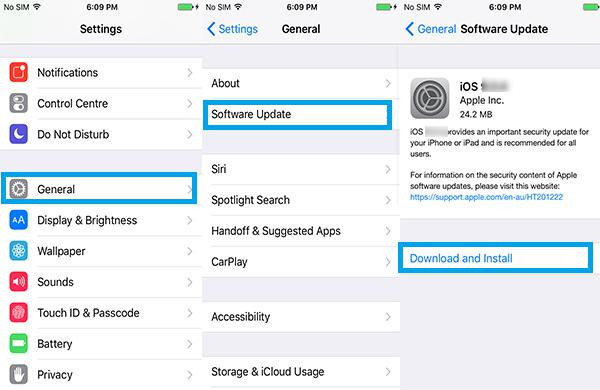
When your device has been upgraded to the new iOS system version, the voicemail problem will be caused by some bugs. This is a serious problem which gets Apple’s attention and a new version will be leased to fix the bugs. Lots of bugs can be fixed by the latest iOS version. The voicemail problem can be solved by updating iOS system version if the latest version has become available. You can run setting app on your device if the latest version has become available. Then go to General > Software Update to check whether the new iOS version becomes available. Finally, update iOS system version by tapping on downloading and Install.
4. Fix iPhone voicemail issue by updating or contacting carrier.
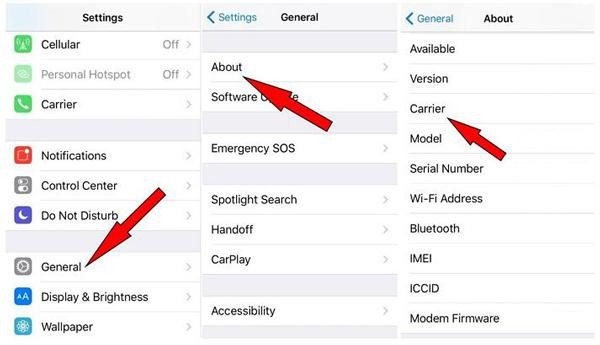
To fix voicemail not working issue, we can get access to carrier site to ask for help. By updating the carrier on your device, the voice mail problem can be solved. You can enter settings on iPhone, then go to General > About > Carrier to finish the carrier updating task.
5. Fix voicemail not working issue by turning on or turning off Airplane Mode.
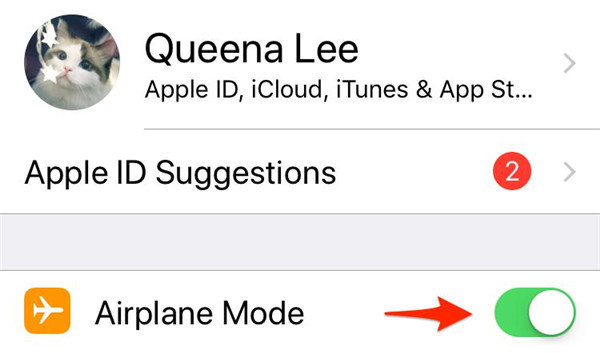
This method also works well in fixing voicemail issue. You can go through Settings > Turn on Airplane Mode > Turn it off after 30 seconds to complete this task.
Part 3: How to set up iPhone visual voicemail properly
A list of messages can be seen via visual voicemail, you select the one that you want to listen to or get rid of. Here we will teach you how to set up iPhone visual voicemail as follows.
Make sure that the visual voicemail is supported by your carrier, then it can be set up like this:
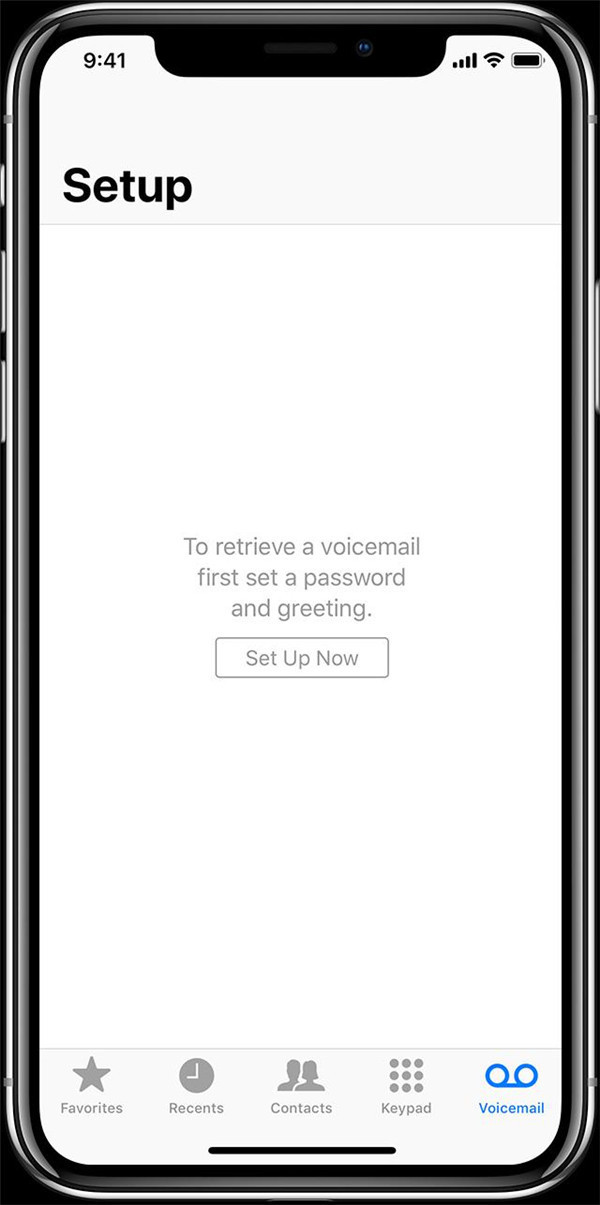
1. Tapping on the voicemail tab via the phone app.
2. Tap on the option “Set Up Now” on the Setup page.
3. Set up a voicemail passcode and tap on “Done”.
4. Confirm the passcode by entering it one more time and then tap on “Done”.
5. Choose the option “Default” or “Custom”. A new greeting can be recorded if you choose the “Custom” option.
6. Save the recorded greeting by tapping on “Done”.
Extension: Save voicemail to voice memos and selectively back up it before fixing without data loss
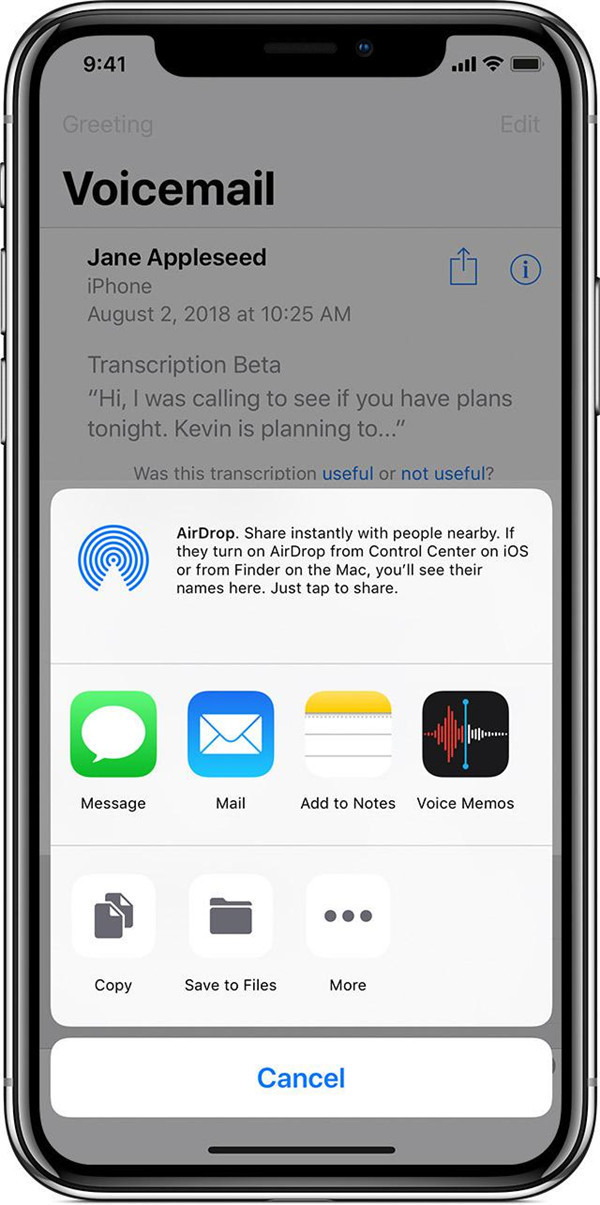
The purpose of saving voicemail to voice memos is to facilitate us to share it via Messages or Mail or Airdrop. If you want to save voicemail, a carrier is a must to help you to support the voicemail. Maybe you have no idea whether the visual voicemail is supported by your carrier or not. In this case, you can consult them to gain more information. What can you do to save the voicemail to voice memos? The specific steps are listed below for your reference.
1. Turn on your iPhone and go to voicemail.
2. Choose the voicemail message that you want to save and tap on the icon button which looks like the upper arrow standing on the square.
3. Select the option “Add to Voice Memos” and then you can complete the task of saving voicemail messages to voice memos.
In order to prevent any data loss in voice memos on your iPhone before fixing. You need to back up the voice memos to avoid the sudden deletion of important voicemail on your device. What can you do to back up the important data from your iPhone in a simple way?
Here we will recommend you an easy-to-use data recovery software - Leawo iOS Data Recovery to help you back up voice memos from your iPhone. Leawo iOS data recovery is usually used for recovering deleted or lost data from Apple devices. Also, it can be acted as a useful data backup tool to back up any data on iOS devices. Below we will guide you how to back up the voice memos via Leawo iOS data recovery.
1. When you run Leawo iOS data recovery on your computer, you will see three recovery modes on the main interface, that is Recover from iOS device, Recover from iTunes Backup and Recover from iCloud Backup. To back up voice memos from your iPhone, you have to choose the first tab “Recover from iOS device” to perform the backup task.
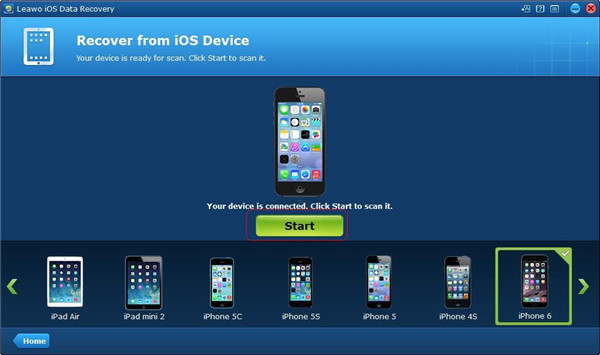
2. Associate your iPhone with your computer via USB cable, then choose your device on the bottom list and click on the “Start” button to begin to scan your iPhone.
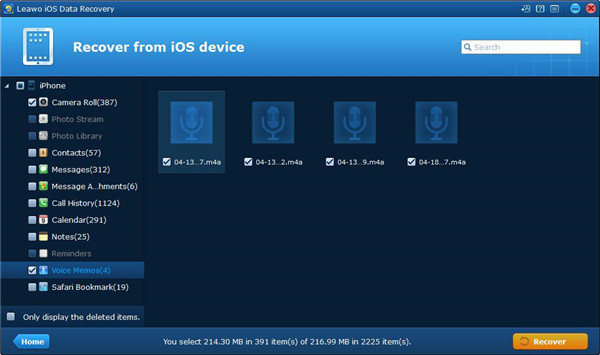
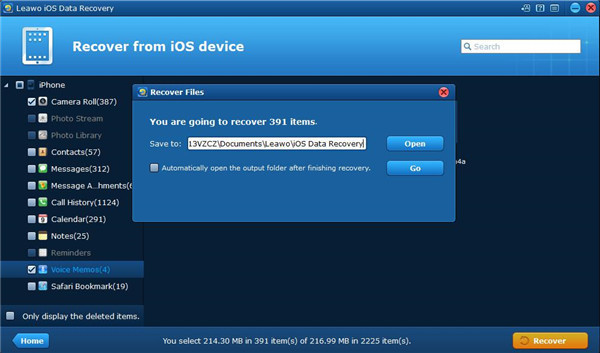
4. The scanning process will take a few minutes, then choose voice memos in the left sidebar by checking the squarebox beside it after the scanning is completed. You can view the detailed content of the voice memos in the right part, choose the voice memo that you want to back up and click on the “Recover” button.
5. A dialog will pop up when you click on the “Recover” button. You need to choose an output directory to store the voice memos that you want to back up by click on the “Open” button. After you have selected output directory for saving your voice memos, click on the button “Go” to begin to back up the voice memos from your device. Once the backup process is completed, you can find the voice memos that you want to back up have been saved in the output directory that you just chose.
Seen from the above steps, you can find it easy and convenient to use Leawo iOS data recovery to back up voice memos from iPhone without any data loss. It is a professional back up tool that can be used for backing up any important data to prevent data loss on your iPhone.

