
"I have an LG burner model WH14NS40. I knew ahead of time it came without software. I have tried getting several different programs to burn these files to a Blu-ray disc, but either they fail or the trials are junk. Can you recommend a good (free or paid) program to create Blu-ray discs?" If you have MP4 video files and plan to burn MP4 files to Blu-ray disc for either safekeeping for convenient playback, this guide would be helpful. It shows you detailed steps on how to convert MP4 to Blu-ray disc with the best MP4 to Blu-ray converter software.
Part 1: Why to Convert and Burn MP4 File to Blu-ray
"Just a quick question, Can I burn MP4 to Blu-ray and play it in a Blu-ray player like the same process with DVD?"
"I have collected a large library of movies in MP4 format. Is there a program that could burn all of my movies to Blu-ray disc for watching on the home theater system?"
Since there could be tons of users asking around the method for turning MP4 to Blu-ray disc, you can hear so many voices like that. These requiring demands are knocking the door of why people want to convert MP4 to Blu-ray. What are the benefits? As a matter of fact, a couple of aspects will light up the way to the answer.
First of all, optical discs are practical as containers for mega data. And Blu-ray discs are able to store a large amount of digital media data as hard copies. Thus, one of the main reasons people doing that is for freeing up the computer space or other hard drives and devices.
Meanwhile, all those files can be well-protected in discs since the cyber-security has been a widely discussed issue nowadays. This is also one of the ways to back up your files from PC. Want to play safe? Move your MP4 to Blu-ray for saving apprehension.
Another point is the Blu-ray playback quality is possibly the most advanced so far. With the convenience of playing discs, the home reaction can count on the premium movie experience from Blu-rays. That being to say if you have massive MP4 movies, burning the original MP4 to Blu-ray is no doubt a wise yet the top choice. Get what you need to burn a Blu-ray and go with the hands-on instruction!
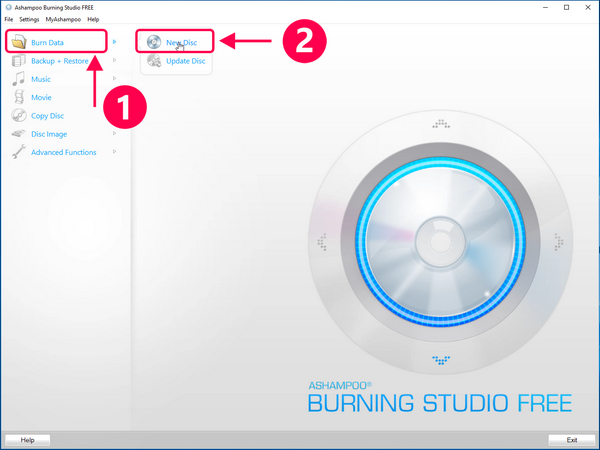
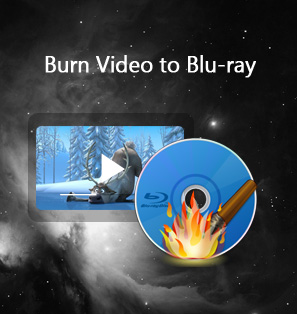
Part 2: Burn and Convert MP4 to Blu-ray with Leawo Blu-ray Creator
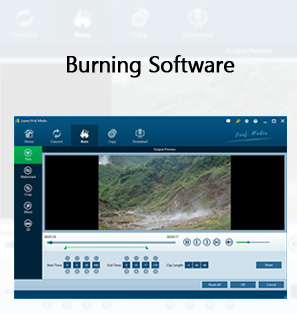
As the best MP4 to Blu-ray converter and burning software so far, Leawo Blu-ray Creator can help you not only convert MP4 to Blu-ray but also burn videos in formats like MKV, AVI, FLV, MOV, MTS, M2TS, etc. to Blu-ray for home theater enjoyment. Various outputs are supported, including Blu-ray disc, folder, and ISO Image file. For more professional-looking Blu-ray, you are also provided with 40 plus Blu-ray menu templates for free selection. Besides, you can customize the thumbnails, buttons, frames, and text of your Blu-ray menu.
![]()
![]()
Personalizing the Blu-ray menu background image and music with favorite pictures and songs is also accessible. Performing far more than the best Blu-ray burner software for Windows, it is able to also serve as a video editor to make customized works. It is embodied with 2D to 3D converter to create 3D Blu-ray content. If you are curious about how to convert MP4 to Blu-ray with ease using this handy tool, check out the below guide to find the answer. For Mac users, please go for Leawo Blu-ray Creator for Mac.
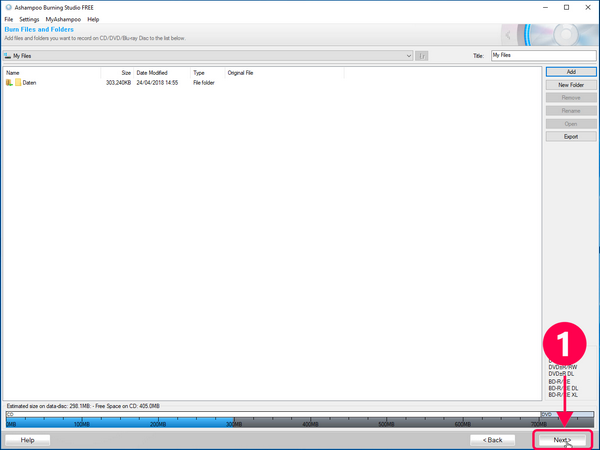
Step 1. Add MP4 video files
Start the MP4 to Blu-ray converter. Click the "Add Video" icon to import MP4 files for burning. You can also directly drag and drop all MP4 files to the program left processing list.
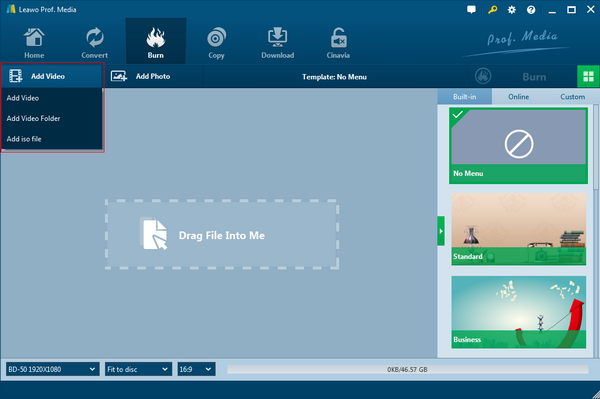
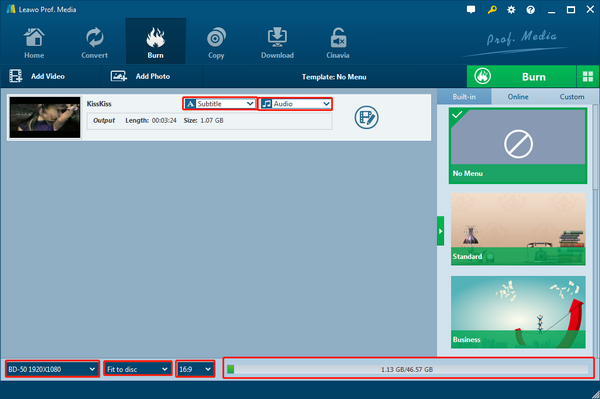
Once the MP4 file is imported, the window will show with a bar. Here you are also allowed to choose the desired subtitle and audio track for output. If you need to load external subtitles, this Blu-ray burning software also provides you access – the "Add Subtitles" option.
Step 2. Edit Videos (Optional)
Via selecting a video clip and clicking the "Edit" icon in the loaded video title, you can access the "Video Edit" window, where you can edit your videos by trimming, cropping, applying special effects, adding watermarks, and adding 3D movie effect. You could get a customized Blu-ray movie by editing.
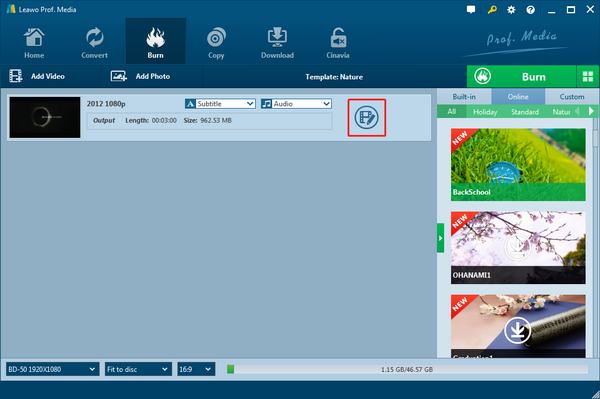
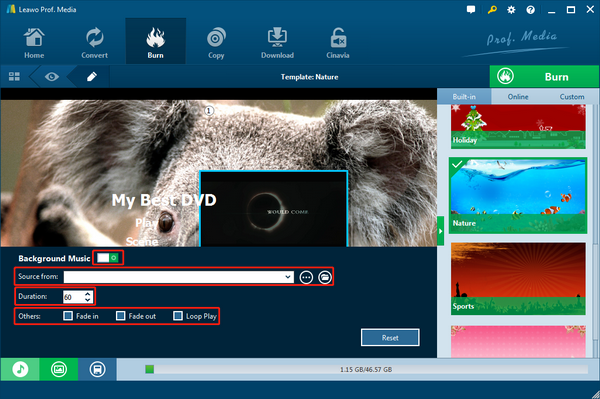
Step 3. Set disc menu
The disc menu template selection is available on the program right panel. Select one and click the eye-shaped icon of the selected one to get instant preview. On the preview panel, you could see a pencil-shaped icon, by clicking which you’re able to edit selected disc menu like: add background music and picture, change title content and position, adjust text color, size, font, etc.
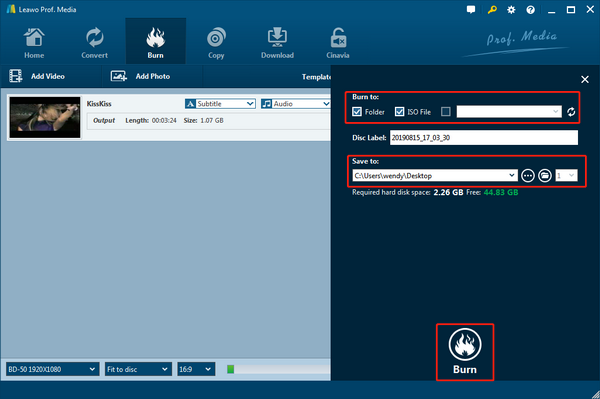
Step 4. More burning settings
Please remember to prepare a blank Blu-ray disc and insert it to a writable Blu-ray drive. After you click the big green "Burn" button, a burning setting sidebar menu will pop up for you to choose to burn MP4 to Blu-ray disc, folder or/and ISO Image under "Burn to" option (which allows multiple choices), input a desired "Disc Label" as you like, set saving folder for output Blu-ray content in the "Save to" directory.
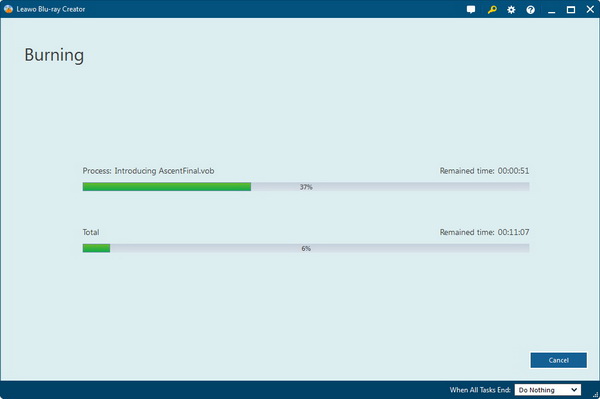
Step 5. Convert MP4 to Blu-ray
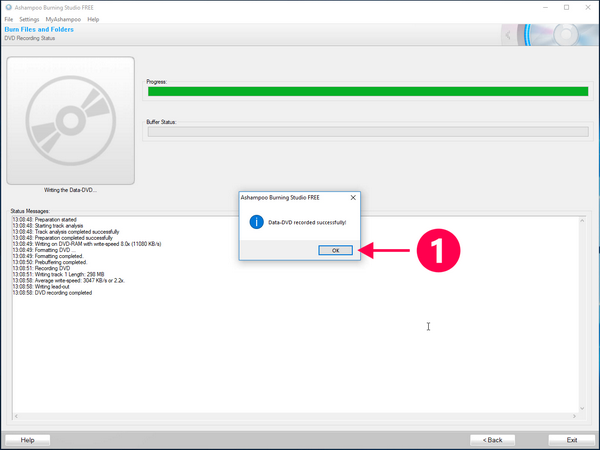
The final step comes. When you finish all settings, just click the "Burn" button on the burning setting panel to start the process of burning MP4 to Blu-ray.
Part 3: Burn and Convert MP4 to Blu-ray with ImgBurn
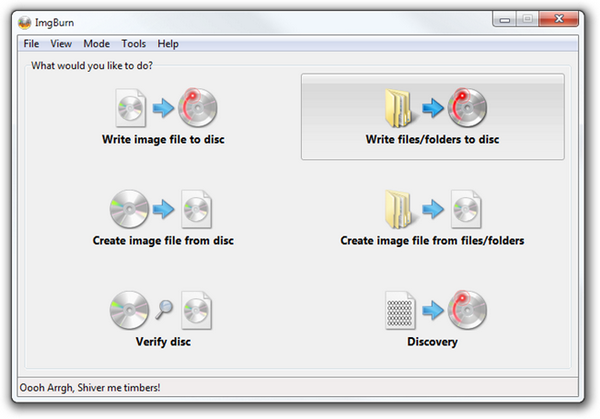
Step 1. Choose the function of “Write files/folders”
Run the ImgBurn after download and install it properly. Open the MP4 to Blu-ray converter and click on the “Write files/folders”.
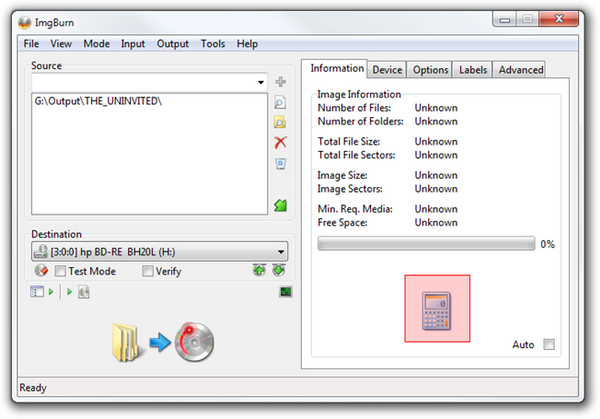
Step 2. Input MP4 media data
Click on the folder icon that is in the source frame. Usually, the root folder of the Blu-ray data should be imported as a whole.
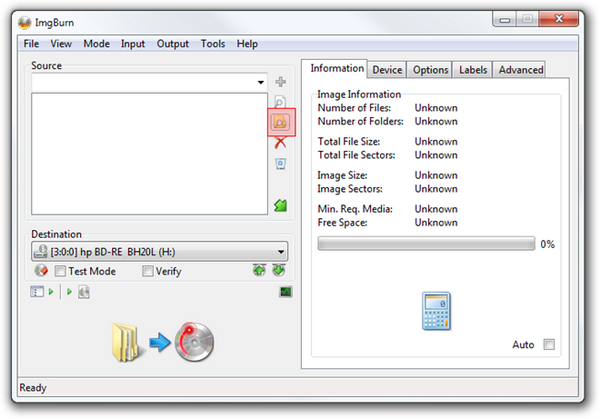
Step 3. Measure the availability to convert MP4 to Blu-ray
Tap the Calculator icon that sits at the bottom of the right frame from the “Information” tab.
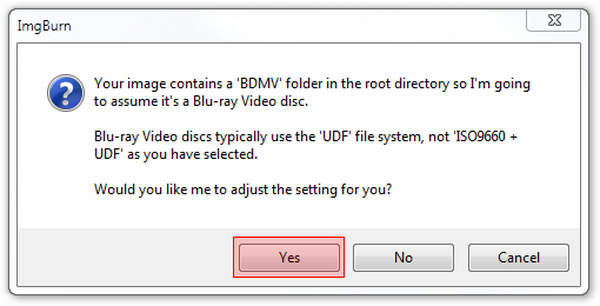
Step 4. Confirm the option
If the procedure is feasible, there will be a prompt window telling you detailed info to make sure every parameter is on the correct trail. Keep clicking the Yes when it is approachable.
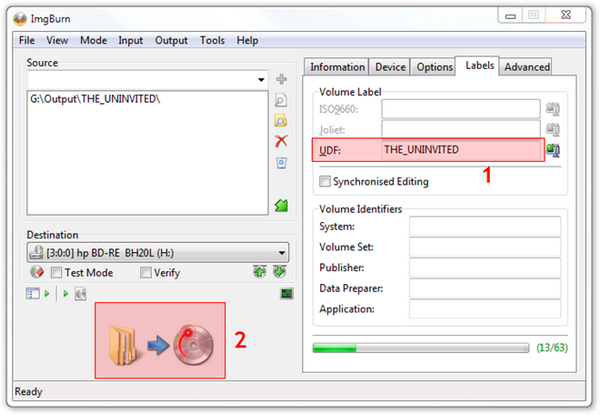
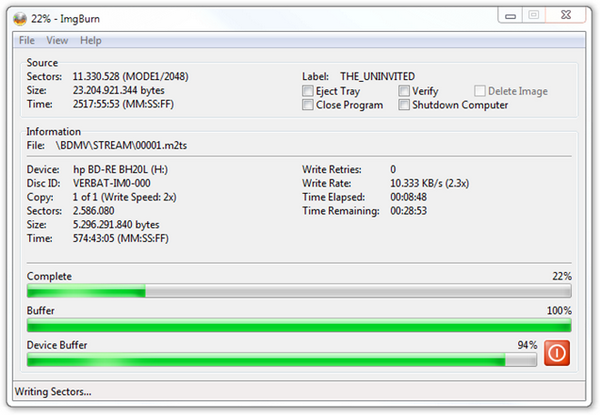
Step 5. Get ready to burn MP4 to Blu-ray
Insert a writeable Blu-ray disc and set it to the destination. You can rename the Volume Label by some descriptions. Then hit the “Burn” icon under the destination.
Step 6. Double-check the content Type
Be sure this one is settled for the “BD Video” and continue with OK.


 Sep. 07, 2021 by


 Prof. Media
 Blu-ray Ripper
 Blu-ray Copy
 iOS Data Recovery
 [12/29/23] MAX Downloader V15.0.0
 10,000,000 people are using Leawo!
 All Transactions are protected!
 30-Day Money Back Guarantee!