Nowadays, as an advanced technological achievement, iPhone is very convenient to our work and makes a great difference on our life. However, sometimes, some people is depressed by iPhone's small or large font size which brings discomfort. For those who is old or with eye diseases, the regular font size on iPhone is inappropriate, thus a change on iPhone font size is necessary. So how to change font size on iPhone? Here I am to present several ways for you to change font size on iPhone.
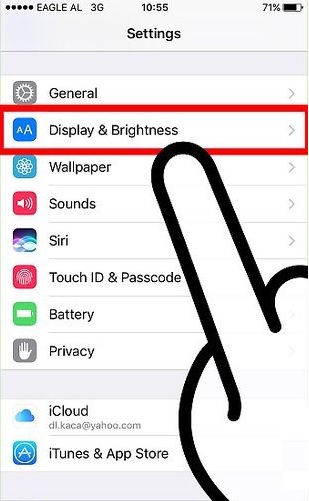
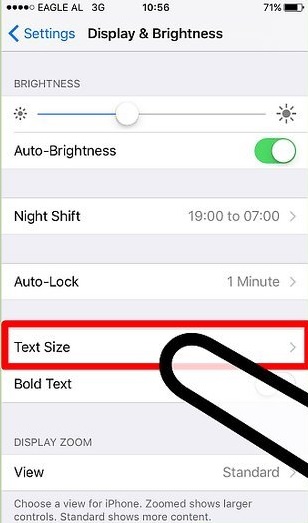
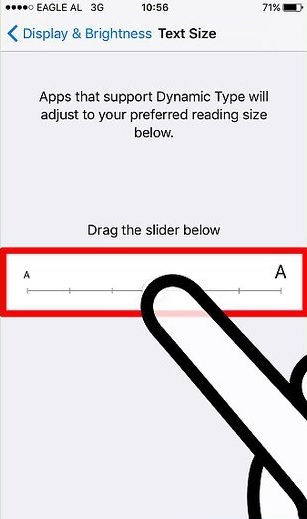
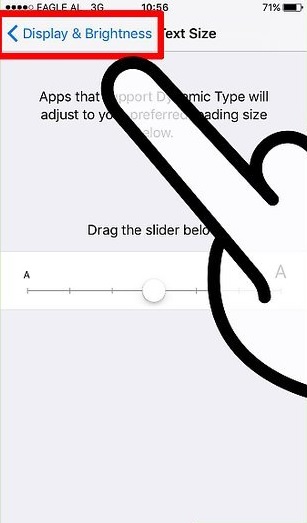
Way #1: Change Font Size on iPhone Using Display Settings
Changing font size on iPhone can be an easy task once you follow the step-by-step guide making use of display settings.
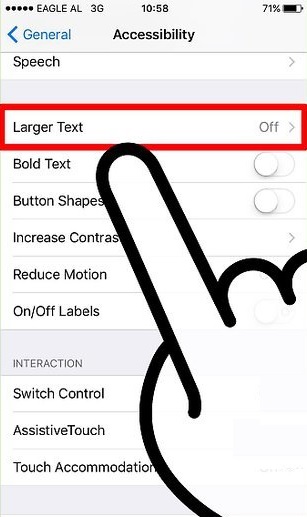
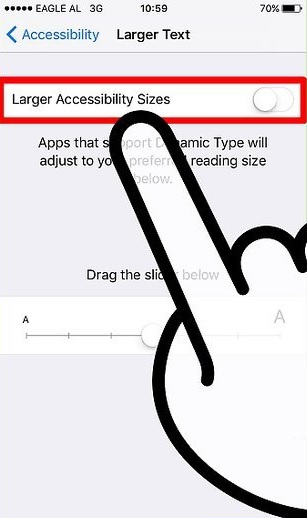
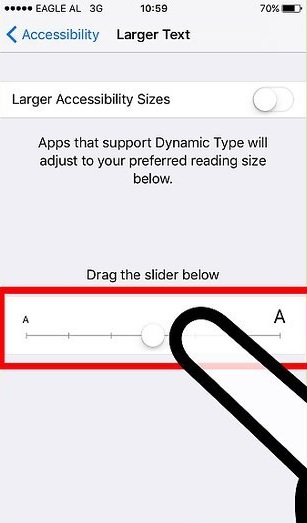
Way #2: Change Font Size on iPhone Using Accessibility Settings
Besides, you can use accessibility settings to change font size on iPhone. Take a look at below.
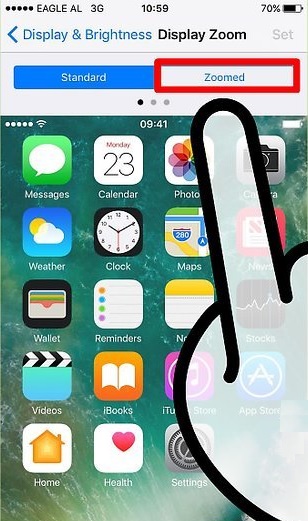
Way #3: Change Font Size on iPhone Using Display Zoom
With the launch of iPhone 6 and 6 Plus, a new feature is getting the bad rap: Display Zoom. Tucked under Display & Brightness setting, the Display Zoom modifies the “view” of the iPhone 6 and 6 Plus display. The feature is intended for a small niche of people who might need spectacles to read or use their iPhones but find the typical zoom feature too cumbersome.
You will also be shown how your iPhone’s screen looks when you have display zoom set to on/off. The result is that you have a partially “zoomed-in” view of the existing interface. It is not exactly useful or likable for a majority of people but folks who can’t read small text (but are annoyed by the default zoom feature in iOS) will find it useful.
I do hope these methods can help you easily change iPhone font size.
Bonus: How to change the font in mail on iPhone
Changing the font size under the display, display zoom or accessibility settings should also apply to the iOS Mail app. If you want to change the font type entirely, the good news is that it's possible in the Mail app, although you will need to be running iOS 13 on your iPhone. By default, Apple uses its own San Francisco font (which applies system-wide), but using custom fonts in the Mail app will allow your emails to look unique, fun, and distinguishable from the rest. While that sounds like something you want to do, you may not immediately know how to do it. In addition to how you can change the font size on iPhone, we will also show you how to change the font entirely in the Mail app. Follow the steps below.
Step 1: Open the Mail app on your device. Tap the email account you want to use then tap the compose icon at the bottom left. Enter the email address, Cc/Bcc and the subject as required.
Step 2: Tap the text field (where you write the contents of the email) then tap the left-facing triangle on top of the keyboard.
Step 3: Tap the font icon represented by an upper and lowercase letter a. This will take you to the formatting settings. Tap “Default Font” and you will see a list of fonts.
Step 4: Choose your font. There are dozens of fonts available for you to pick from. After you have made your choice, tap the font to select it. You will see the name of the font you have chosen in the formatting settings.
Step 5: Finally tap the text field to begin using your new font choice.
Please note that some fonts might not work, which you will notice once you begin composing your email. This is because they are not currently supported, or because of glitches in iOS, although patches and fixes will be released in future updates.
Related tutorial: How to add an attachment to an email on iPhone

